Quidditch – Shin Guards

dsc_0193
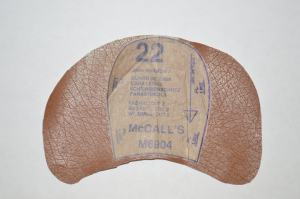
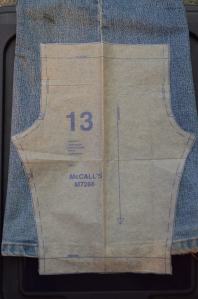
On Day 3 of our Quidditch uniform tutorials, we’re going to attempt shin guards for our Quidditch player. We’ll be modifying the same McCall’s 6904 pattern that we used for the shoes and socks.

Materials needed:

  • McCall’s 6904 view J
  • brown synthetic leather (I used the same fabric and I used for the shoes)
  • tan or cream fabric for the piping and back of the pads
  • piping or string/yarn to make your own piping
  • matching thread
  • 3/4″ Velcro or elastic

If you want to keep things simple, you can follow the exact directions for making the shin guards. We’re going to add several steps to get them to look a little more like the ones in the movies.

dsc_0168

We’ll need to make the pattern much wider than the original. It is almost 5.5″ wide. Here are the margins I drew:


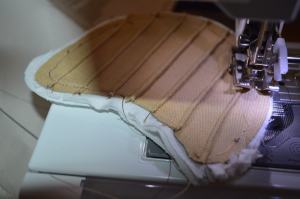
From here it’s time to  start sewing the individual panels on the shin guards. Start by folding right sides together and sew close to the folded edge.

dsc_0171

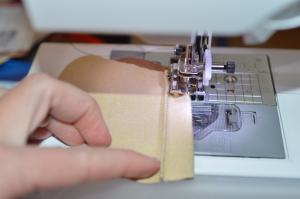
With right sides together, you’ll continue to sew creases into the fabric. Keep the spaces equidistant apart. My grooves were about half an inch apart, but I just eye-balled the spaces as I went.


When you finish sewing all the way across, it will look something like this:


If you don’t want to bother with piping and want to finish quickly, you can trim any jagged edges, stitch around the edge, attach elastic at this point and be done. The pattern has brief directions to help you here too.

If you want to be a little more polished, it’s time to add piping. If you’ve never worked with piping before, I highly recommend this tutorial from Polkadot Chair. Please read through that tutorial to help the next part make sense.dsc_0180


I didn’t have piping on hand, so I cut 1″ X 16″ strips of cream fabric on the bias and folded it over with braided yarn on the inside. Tan would be ideal to match the movie look and stand out against the pants.


Take your piping and sew it to the edge of your shin guard. You’ll need to cut the curved corners as you go.


I’m going to use leather strips with Velcro to attach the shin pads on my doll. You’ll need two 2″ X 1/2″ strips of leather and two 2.5″ X 1/2″ strips. You’ll be sewing these right sides together like you see in the picture. The longer strips go on the top.

dsc_0184


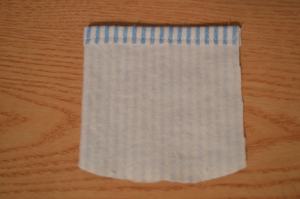
Now you’ll be preparing and sewing the back side. First trace your shin guard onto your white/cream fabric. Leave a wide margin.


dsc_0185


Put right sides together for a pretty thick sandwich. Sew it with the leather side on top. That way you can see the stitch lines from where you attached the piping. You’re going to sew right on that line. Leave a section open to turn the right side out.


dsc_0186

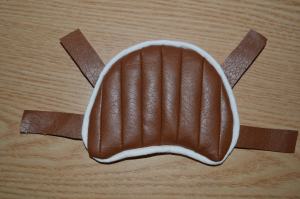
When you turn the right side out, it will look something like this:


Now attach Velcro to the straps. I cut a 1″ strip of the 3/4″ Velcro in half for a long skinny strip. Then sew them on the leather so that they can be attached to your doll.

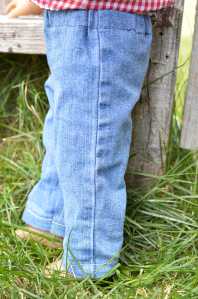
There you go! Shin guards to keep your doll safe during her next Quidditch match! Next post will focus on knee pads.

dsc_0189


Quidditch – Pants, Shoes, and Socks


dsc_0115

Hi! For Day 2 of Quidditch tutorials, we’re going to make the uniform pants, shoes, and socks to go along with the robe we made yesterday.

The pants are simple. You can use any pants pattern you have on hand. The goal is to make the legs tight enough to fit easily under the Quidditch pads we’ll be making later, but loose enough to fit over your dolls feet.

Materials needed:

  • Simplicity 4297 View G or any other pants pattern you already have
  • 1/2 yd white/cream pants weight fabric, such as broadcloth, lightweight denim – it helps if it has a bit of stretch to help with dressing your doll
  • 1/2 yd of 1/2″ wide elastic
  • white thread

Make the pants according to your pattern’s directions. If the directions are for skinny jeans, you probably won’t need to alter them. If you need to make them more snug: turn them inside out, pin the outside seam, check that the dolls feet can still get through the pants legs, and sew.


Since that was relatively quick, we’ll keep going and add the shoes and socks too.

Materials Needed:

  • McCall’s 6904 pattern Views H and K
  • cardinal/burgundy knit fabric (I used fabric leftover from the Quidditch robe)
  • brown synthetic leather – 13″ X 8.5″
  • 8 brown eyelets
  • brown lace/cord (I used the same “Brown 1/8″ Poly Soutache Braid” from Hobby Lobby that we used for the Quidditch robe’s lacing; it’s often on sale for 50% off)

Just follow the directions for both the socks (View H) and sneakers (View K).

If you want to leave the stripes off the sneaker, you can make a simple, brown sneaker.

You can also modify the pattern for the stripes to just make an upper for the sneakers. I traced the pattern and left off the strips. From there you follow the directions to stitching the upper.


dsc_0166

Here’s a side-by-side comparison of the sneakers with and without the upper, so you can see which look you like the best.


We’ll next be working on Quidditch pads!


Quidditch Time! – Robe

dsc_0086

Harry Potter!!! Can I gush enough about this series!?! My kids are too young to enjoy them, but I’m already planning Halloween costumes, parties, and trips to the Wizarding World of Harry Potter in my mind. Since there is quite a bit of time until then, I’ve decided to practice up for their future costumes by making them for dolls – cheaper and faster.

There are already a lots of amazing posts on how to transform your 18 inch doll into a Hogwarts student. My favorite is the tutorial at Arts and Crafts for Your American Girl Doll. It is amazing! In addition to the full school uniform, it shows you how to outfit your doll with a wand, Maurauder’s map, cage for Hedwig, broom, etc. The site provides a free Hogwarts robe pattern and tutorial., which is what we’re going to use today to start our Quidditch uniform.

The robe pattern and tutorial set you up to make a classic Hogwarts school uniform. We’re going to switch the colors to make a Quidditch robe. I’m making a Gryffindor team uniform, but you could select colors to support any House you’d like.

Materials Needed:

Follow the great tutorial provided with the pattern to make your robe. Just remember to keep the color substitutions straight in your mind as your sew: substitute your red fabric for the black outer robe; substitute your yellow fabric for the inner robe lining. I made my robe completely yellow on the inside (the tutorial calls for red and black panels on the inside). The goal is to get the look of the Quidditch uniform in Harry Potter and the Sorcerer’s Stone. You could also shorten the sleeves to 3/4 length if you want – Quidditch robes sleeves are shorter than school uniform sleeves.

dsc_0085
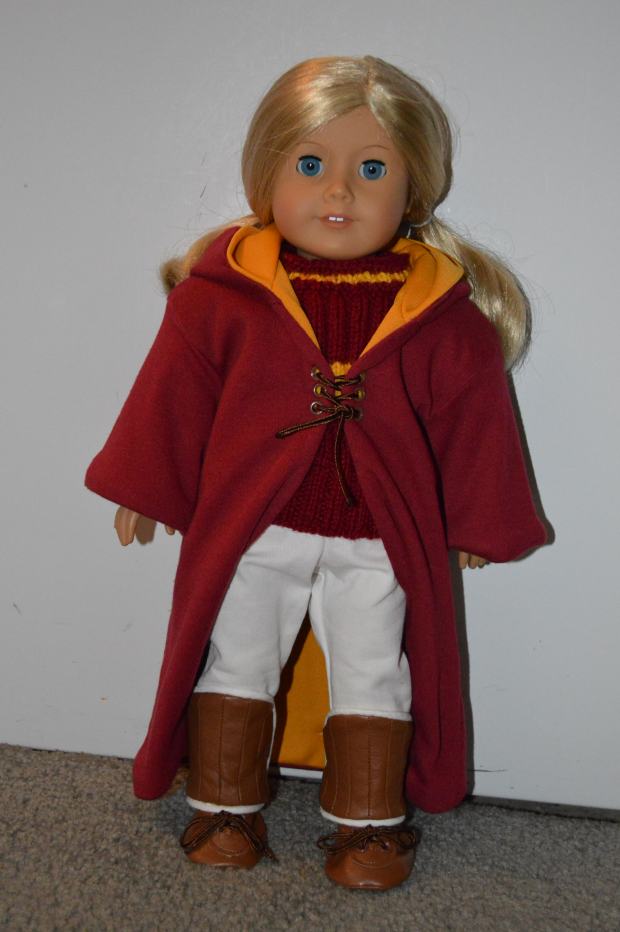
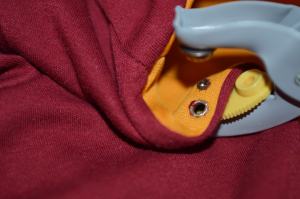
Once you finish your robe, we’ve got to add the eyelets and cord to make it look Quidditch ready. I use Drtiz’s Plier Kit that applies both snaps and eyelets. I bought it at Joann Fabrics last year. Unfortunately, I can’t find it on their website. It works fine for eyelets, but I’ve had trouble getting snaps to go on properly. If anyone knows of a great system/tool for eyelets, I’d love to hear about it. Mark your eyelets carefully before you apply them. It’s heartbreaking to misplace a hole after that time sewing.


dsc_0087


Lace the uniform with the cord.

If you want to make sure the cord doesn’t fall off when the robe isn’t being worn, you might want to tack it down from the back on one side.dsc_0097 
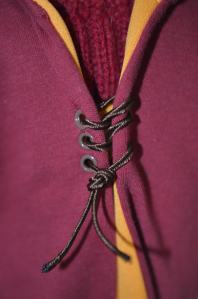
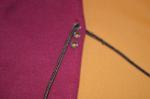
That way it can be untied, but still stays attached and won’t go missing.


You can keep the cord from fraying with a couple of methods. Melting it melting it with a  match works, but I find this makes the end a little too rounded and more difficult to put through the eyelets. An alternative is to use a hot glue gun. Smear a bit of glue onto the frayed end. Once the glue has cooled but is still malleable, roll the end together into a cylinder. Either method you use, be careful not to get burned.

Step one is complete. More uniform tutorials to come!


Charlotte’s Web – Finishing Touches

We’ve made it to our final post of the Charlotte’s Web Fern costume. We’ve made the shirt and jeans in a previous post. Now we’ll put everything together.

dsc_0067

Since Fern is knocking around the farm, we’ve got to keep things simple. I rolled up the jeans to give them a capri look. Styled her hair in pigtails with ribbons. If you have a pair of tennis shoes or flats you can use those, or you can just let Fern go barefoot. A stuffed pig to serve as Wilbur would be ideal. Round up any stuffed animals you have around that could serve as the animals on Zuckerman’s farm: sheep, geese, horses, cows, rats… I even found an old Beanie Baby Spider I had from my teaching days!

Fern is all ready to raise her little runt of a pig! Get the tissues ready for that heart warming ending.

Please come back for my next post. We’ll be heading a favorite series that first inspired me to start making doll clothes.

Charlotte’s Web – Fern’s Jeans / Doll Jeans Shortcut Tutorial

Welcome back to our second post for Charlotte’s Web. Previously we made Fern’s shirt. Today we’ll use a little shortcut to make a pair of doll’s jeans from an old pair of adult/kid jeans. With these directions you’ll keep the original Flat Fell Seam (denim seam) on the outside and leg hem! A nice little short cut for fast doll jeans!

To make these jeans, pick an old pair of jeans that have worn out, are being cut into shorts, or are just out of style. You’ll just be using the bottom 12″ of the legs. Adult jeans work easily because you’ll be cutting below the knees. Kids jeans may work depending on the condition of the knees and whether or not the legs are wide enough.

For the tutorial I used McCall’s pattern 7266 View F, but you can use any pants pattern you have for you doll that consists of only pattern piece (some have 2 pieces for a separate front and back).dsc_0063


Start by folding the pattern piece for the pants in half. Just to find the center line.


dsc_0082

Next, position the leg of the jeans with the outside flat fell seam in the center. Line the center of the pattern directly over this seam. You might need to cut the leg open from the inside seam if they are thinner jeans. In the picture here, the pattern can fit across folded boot cut jeans.

Notice that the pattern is hanging off the end of the jeans. Since you’re using already hemmed jeans, you won’t be hemming the doll’s pair that you’re making. Line up the hemline marked on your pattern with the bottom of the jeans.

Pin and cut. Repeat for the second leg.

From here, you can follow the pattern’s directions for sewing the center front, center back, waist, and inner leg seam.

Viola! A relatively easy pair of jeans for your doll.

dsc_0081

On our next post, we’re going to put Fern’s costume together and finish up our Charlotte’s Web theme.


Charlotte’s Web – Fern’s Shirt

Charlotte’s Web by E. B. White will always have a special place in my heart. An amazing story of friendship, loyality, and sacrifice. It’s a great story for broaching the topic of death, and it’s a wonderful read aloud. As an added bonus, sewing this outfit is simple and straightforward – yay! You’ll be ready to read Charlotte’s Web with your child in no time.

Fern is the girl who saved Wilbur at the beginning of the story and went on to care and love for him. We’re going to make an outfit for Fern – we’ll start with her shirt.


Materials needed:

There are no special directions for this shirt. We’re even using the colors shown on the pattern. Just follow the directions for View A and you’re good to go. The trickiest part is adding the rick-rack to the neckline. Be careful to keep everything flat -it can bunch up the neck and make it too tight.

The shirt is simple and fits the country/farm setting. Fern will look like she’s changed clothes after school and is heading down to her uncle’s farm to play with Wilbur.

The next post will be rolled up jeans for Fern’s play clothes. It’s going to be a nice hack for making them quickly and easily from an old pair of jeans!

Anne of Green Gables – Accessories

Hi Kindred Spirits! Today is our final post for Anne of Green Gables. The dress and pinafore are finished, so today is about her accessories: boots, hat, and hair ties.

dsc_0024

I made Anne’s boots using McCall’s 3469 pattern. The process of making shoes/boots is definitely a learning process, but it allows you to get the look and color you want for my doll’s outfits. If you already have a pair of black doll boots from another outfit, you’re set!

For Anne’s boots, I used the following materials:

  • McCall’s 3469 patterndsc_0056
  • black pleather fabric
  • black lining fabric
  • interfacing
  • black cord/lacing (I used Hobby Lobby’s “Black 1/8″ Poly Soutache Braid” located with their spools of ribbon. Item #351924)
  • 1/2 yd Soutache (I used Hobby Lobby’s “Black 5mm Elastic Trim” located with their spools of ribbon. Item #683839)
  • black foam (or cheat like I did and just use pleather instead of foam – the heel won’t be as high though)
  • Sixteen 1/8″ eyelets

A few tips I learned the hard way when making boots: be careful with the seam allowances given by the pattern – they’re not very forgiving and it can really throw the size of your shoes. Also, instead of using craft clue to attach the soutache around the bottom of the shoe, I just used a glue gun – far easier and faster and didn’t seem to do any damage to the fabric. Just be careful not to get burned.

For Anne’s hair, I braided her hair in her signature braids and then tied the ends with scraps of material from her brown dress. You could also use ribbon or any other scrap fabric. Remember, we’re going for the poor, orphan look here. The scraps I cut were about 1/2″ X 5″ and tied in an overhand knot. They’d need to be longer if you want to tie bows.

Anne’s hat is a “10″ Round Top Straw Hat” from Hobby Lobby. In the movie, it’s beaten up with chunks out of the edges and the ribbon around it doesn’t match anything. I think it would be really hard to match the movie ribbon exactly. You can pick a ribbon and tie it in a bow around the hat. Or could can go more matchy and use fabric from the dress to adorn the hat.

I hope you enjoyed the Anne of Green Gables tutorial! I’d love to see/post pictures if you make your own!


Anne of Green Gables – Pinafore Tutorial

dsc_0024

Welcome two day 2 of our Anne of Green Gables dress. If you missed the brown dress, you can see the directions for making it here

We’re going to use Simplicity 1179 pattern again today. This time we’ll modify view E to make Anne’s pinafore.

Materials needed:

  • Simplicity 1179 pattern
  • Blue and white/cream striped cotton fabric (I surprisingly couldn’t find shirting in the right pattern at several stores , so I ended up using Blue Striped Flannel Fabric (Sku 425090)  from Hobby Lobby.
  • 2 snaps
  • 2 buttons
  • Tracing Paper*

*Tracing paper will help us make the modifications to the pattern to get the look we want. If you look at the big sheets the patterns are printed on before you cut out individual pieces, you’ll sometimes have blank areas. I save these and use them for tracing/modifying new pieces. You can also use purchased tracing paper, or typing paper – anything that you can trace on. To be honest, you might be able to eyeball the changes and cut them without tracing. Read on to decide if you need to or not.

If you look at images of Anne’s travel dress from the 1985 mini-series, the bodice is rounded and higher than the pattern we are using. The pattern also has a lace collar that we just get to leave off.

dsc_00431

Bodice Back #33 -modifications to top

The Bodice Back (piece #33) directs you to make 4 total copies. Two of this pieces will make the outside back of the dress and 2 will be on the inside as a facing. We’re making modifications to two sections of the pattern.

1) The top is raised and rounded, and the strap is widened. The picture shows the pattern with tracing paper underneath. I traced the original pattern, drew the changes on the tracing paper, and cut out the modified pattern. I then cut all 4 pieces of fabric out based off the tracing paper at this point.

dsc_00461
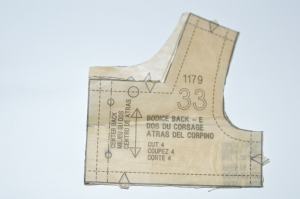
2) The bottom of the bodice is shortened. Using the same piece of tracing paper, I drew the line straight across and drew a second line for the seam allowance. We’re only going to make this modification to two of the four pieces from here. Why only two? More on that next…


dsc_0016Here are the four copies of Bodice Back #33 cut out. I decided to only modify the bottom of 2 of the 4 because I didn’t want to have trouble with the armhole when everything is sewn together.  For the two I modified, I folded them up and pressed them before I cut.


For the Bodice Front #32, the modifications are similar:

dsc_0047

I started by tracing the Bodice Front #32 pattern onto tracing paper just like we did for Bodice Back #33. Once again there are two changes to make.

1) I raised and rounded the collar. Make sure it’s the same proportions as the changes to the Bodice Back #33 so that the pieces will match up. Since we’re cutting on the fold, there are only two pieces. I cut the two bodice pieces based off the traced pattern at this point.

dsc_0048


2) I drew the lines where I wanted the bodice to curve at the bottom. Draw the seam allowance too.


dsc_0017
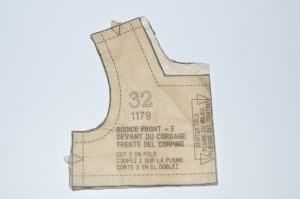
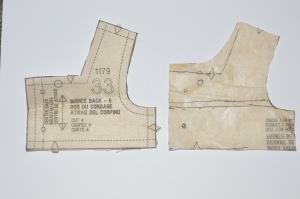
Now it’s time to modify the bottom of one of the two Bodice Front pieces. Once again, we’re only going to modify the bottom of the outside piece, so that the facing can help to maintain the armhole shape. You can see the curve I wanted and the tracing lines on the bottom. I traced and ironed it before cutting out the curve on one of the bodice pieces.


From there you follow the directions on S1179 for assembling the bodice. The longer, facing pieces will be on the inside of the dress and will help maintain the armhole’s shape. The shorter bodice pieces will be on the outside.

Follow the directions in the pattern to sew the bodice pieces together.

dsc_0020

Ouside Bodice – you can see the cut lines and the wrong side of facing


dsc_0019

Reverse side – The inside facing


Next it is time to sew the skirt onto the bodice. Follow the directions that come with the pattern I did make the skirt a about an inch longer to accommodate for the higher, curved bodice. I left the hem raw until I could put it on and make sure it was the right length compared to the dress. I made sure it was just about half an inch shorter than the brown dress.

Anne has two buttons on the back of the pinafore so you can follow the pattern’s directions for sewing the snaps and buttons. No changes needed.

dsc_0022
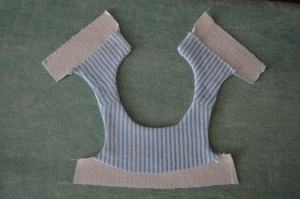
Finally, you need to add two patch pockets to Anne’s dress. There are lots of tutorials online if you’ve never made patch pockets before.

I cut two strips of fabric 6.75″ X 3.75″. The picture above is with the top of the pocket hemmed and folded in half with right sides together. I gently trimmed the bottom of the pocket to make it curved before sewing it together.

I centered the pocket under the front third of the arm hole about 2.75″ down. Pin them in place and sew.

There you go! The next post will be on the accessories.

Anne of Green Gables – Dress Tutorial

dsc_0024

Anne of Green Gables

I thought I’d start my first, official blog post with a classic – Anne of Green Gables by Lucy Maud Montgomery. Anne is curious, imaginative and possesses a charming outspokenness my introverted self longed for while growing up. You can find Anne in books, movies, and mini-series. There’s even a new Netflix television series in the works that is going to focus on Anne and Diana’s strong friendship with a healthy dose of girl power! I’m so very excited!

So without further ado ‘kindred spirits’, let’s make the dress Anne wore to first meet the Cuthbert’s. It is based on the dress seen on many of the book covers and is taken from the 1985 Tv mini-series staring the adorable Megan Follows.

My goal is to show you how to modify an existing 18 inch doll pattern to recreate Anne’s dress. Today we’ll start with the light brown dress with the floral print. From there we’ll make the pinafore, boots, and hair ties.

To make the dress, I modified three patterns: Simplicity 1179, McCall’s 7031, and Simplicity 4297. On a side note, if you’re relatively new to sewing, please don’t pay the $14.95-18.99 prices listed on the patterns. Watch for periodic sales. JoAnne Fabrics and other stores frequently put patterns on sale for $1-1.75. That’s the time to snatch them up! Especially since sometimes it’s easier to combine a couple of different patterns to get the look you want.

Materials needed for Anne’s brown travel dress:

  • Simplicity pattern 1179
  • Simplicity pattern 4297
  • McCall’s pattern 7031
  • 5/8 yd of 45″ (with nap) light brown cotton fabric with floral print (I used “Premium Cotton Fabric – Tiny Roses Parfait” from Joann Fabric’s quilting section. Item # 8509069)
  • matching thread
  • 1/4 yd of 5/8″ sew-in Velcro fastener tape

dsc_0038 
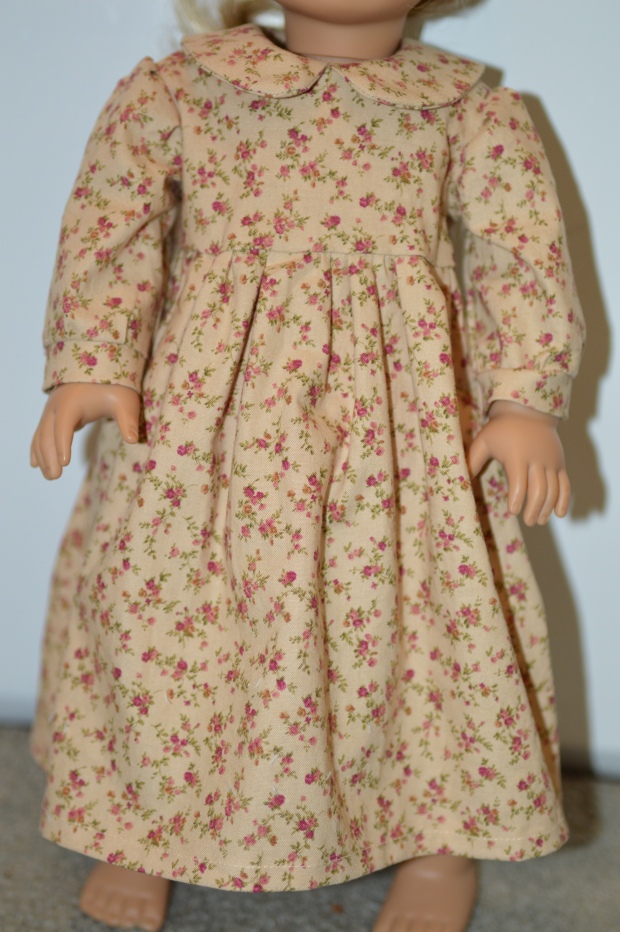
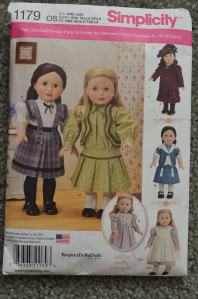
Simplicity 1179 pattern view D is the base of the dress and pinafore. Unfortunately, the cute dress in this picture is just way too fancy for Anne’s orphanage dress. If you round the collar, simplify the sleeves and leave off the lace, you can have a decent little orphan dress. I also made the skirt a bit longer, so add about 3/4 inch to pattern piece #31 before you cut. Then you can hem the length exactly where you want it.


Instead of using the pointed lapels on the collar dsc_0007
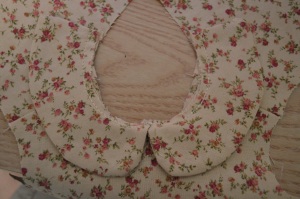
provided with the pattern, I used a rounded collar from McCall’s 7031 (Collar E #11) (nurse/candy striper dress). I just switched out the collars. The pieces matched up enough to work and get the look that you want.

The sleeves also need to be modified to make them more simple. (Sorry Anne, no ‘puffed sleeves’ for you at this point in your story.) Instead, I used the sweatshirt sleeve and band from Simplicity 4297 (pattern piece 10 and #11). Once again, substitute these pattern pieces into the directions given for S1179, but you’ll need the directions from S4297 for attaching the sweatshirt sleeve band to the sleeve.

Since the dress will be covered by a pinafore, I decided to use velcro instead of buttons down the back of the dress. Switch from S1179 to the directions in M7031 View E when it’s time to add velcro.

I would highly recommend finishing the seams in some way – such as cutting the raw edges with pinking shears or using a zigzag stitch at the edge of the seam. Quilting cotton will fray like crazy and looks messy after being washed if it’s not finished in some way. Since we’re hoping our kids love and play with this dress, having the option to wash it may be helpful.

Once you’re done, you’ll have a plain, simple dress ready for that trip to Prince Edward Island! Check back in tomorrow and we’ll add the pinafore!


dsc_00421

About

Hi! Welcome to a site dedicated to helping readers transform their dolls into favorite characters from children’s literature, movies and programs. I am a former teacher with a love of stories and desire promote positive role models to our children.